Tools to use


Lasso tool, magic lasso, paint bucket, paint brush, eraser, clone tool and smudge tool.
Lasso tool

By clicking on a starting point in your canvas, simply drag your cursor around your object to create a path. The Lasso Tool will follow your mouse's exact movements all the way back around to the starting point.
Paint bucket

To use the Paint Bucket Tool in Photoshop Elements, click the “Paint Bucket Tool” in the Toolbox. In the Tool Options Bar, select either the “Foreground color fill” or “Pattern fill” choice. If you select “Pattern fill,” then use the “Pattern” drop-down to the right to select which pattern to use.
Clone tool

Click and hold the rubber stamp icon on the toolbar and select Clone Stamp Tool in the flyout menu.
Move the cursor to an area to copy, copy the area. Move the cursor to where you want to put the copy. Click once to apply the copied image.
Move the cursor to an area to copy, copy the area. Move the cursor to where you want to put the copy. Click once to apply the copied image.
Smudge tool
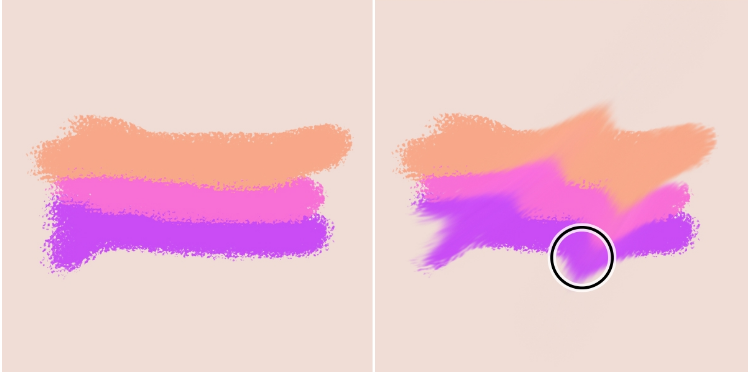
Select the Smudge tool
Choose a brush tip and options for the blending mode in the options bar.
Select Sample All Layers in the options bar to smudge using color data from all visible layers. If this is deselected, the Smudge tool uses colors from only the active layer.
Select Finger Painting in the options bar to smudge using the foreground color at the beginning of each stroke. If this is deselected, the Smudge tool uses the color under the pointer at the beginning of each stroke.
Drag in the image to smudge the pixels.
Using the paint brush tool


First of all, I chose this image and I selected the paint brush tool and set the size to 117, and then drew over it. At the bottom I then selected new gradient hue layer which makes this image seem like a graffiti artwork, this was pretty easy to achieve because it only required you to change the gradient to get this graffiti look.


For this, I set the brush size very high and changed the color to an illuminous white and pressed twice on the tunnel hole to get this sort of enchanted look and how light is coming out the tunnel.
